Capturing Ableton Live Audio to OBS with Loopback on macOS
Published December 29, 2022
Reading time: 2 minutes.
If you’re looking to stream your Ableton Live sessions over OBS and you want to capture clear, crisp audio from your audio interface, you can do it easily with software called Loopback by Rogue Amoeba. It’s a driver and app that lets you create virtual audio devices with almost no noticable latency. Once you set up your virtual devices, you can select them in your capture software as the audio source. While there are a number of other options you can use to do this, Loopback has some great options others don’t provide, especially if you want to make OBS work with your audio interface’s local hardware loopback features for even lower latency.
You can capture Ableton’s audio directly by creating a connection between the outputs in Ableton to the output in Loopback, as the following image shows:
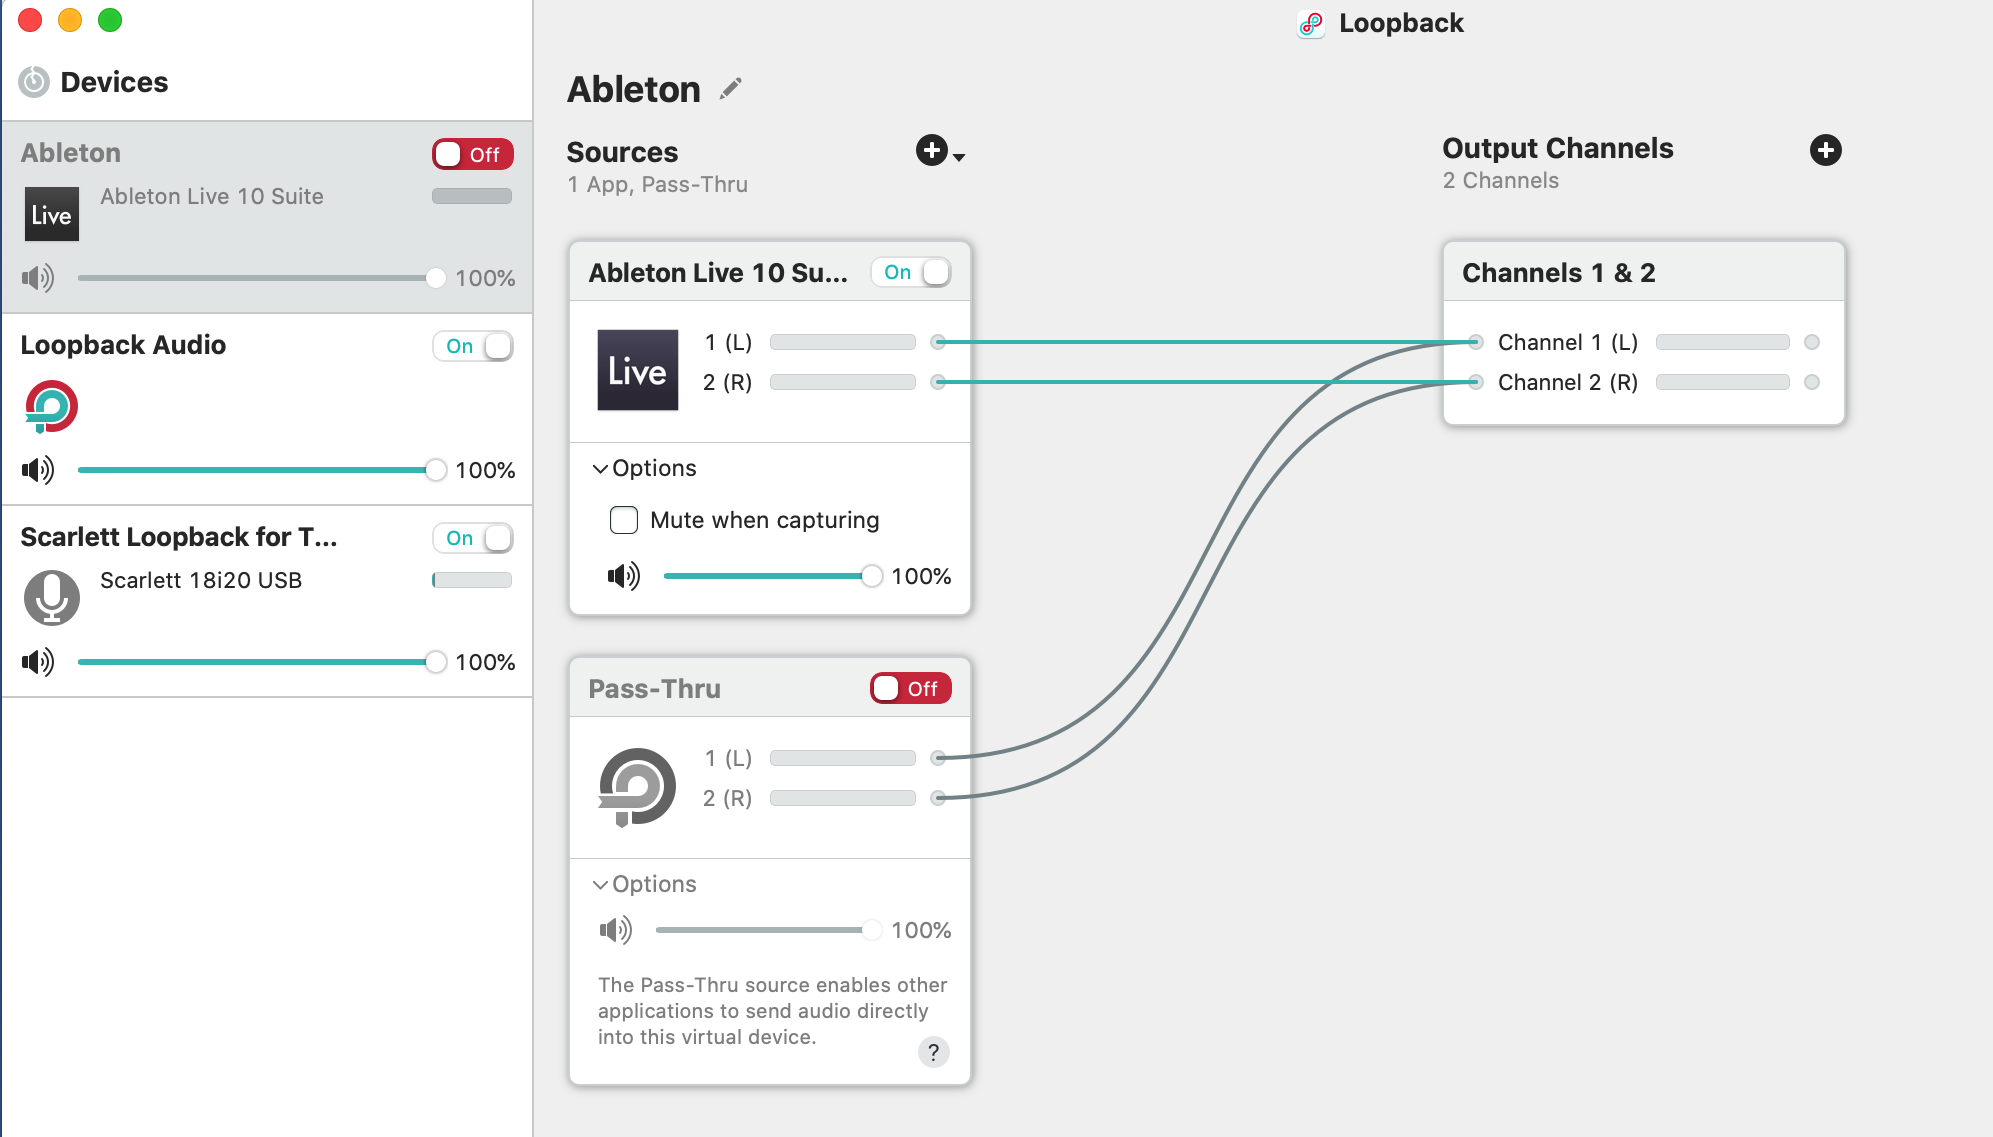
This is the “hijack the local desktop audio stream” approach. It works well with Loopback. But there’s a better way if you have a higher-end audio device.
Remapping Hardware Loopback Devices for OBS
Some audio interfaces have their own internal loopback channels. The Scarlett 18i20, for example, has loopbacks on inputs 9 and 10. Unfortunately, while many video and audio capture devices will let you target those sources, OBS only sees the first two channels. Using Loopback, you can create a new output and map the channels on one device to outpus 1 and 2 of the virtual device.
To do this, create a new virtual device in Loopback. It’ll populate with a Passthrough device and an Output device:

Add a new source and choose your audio interface. The first two channels will be mapped to the virtual output device.
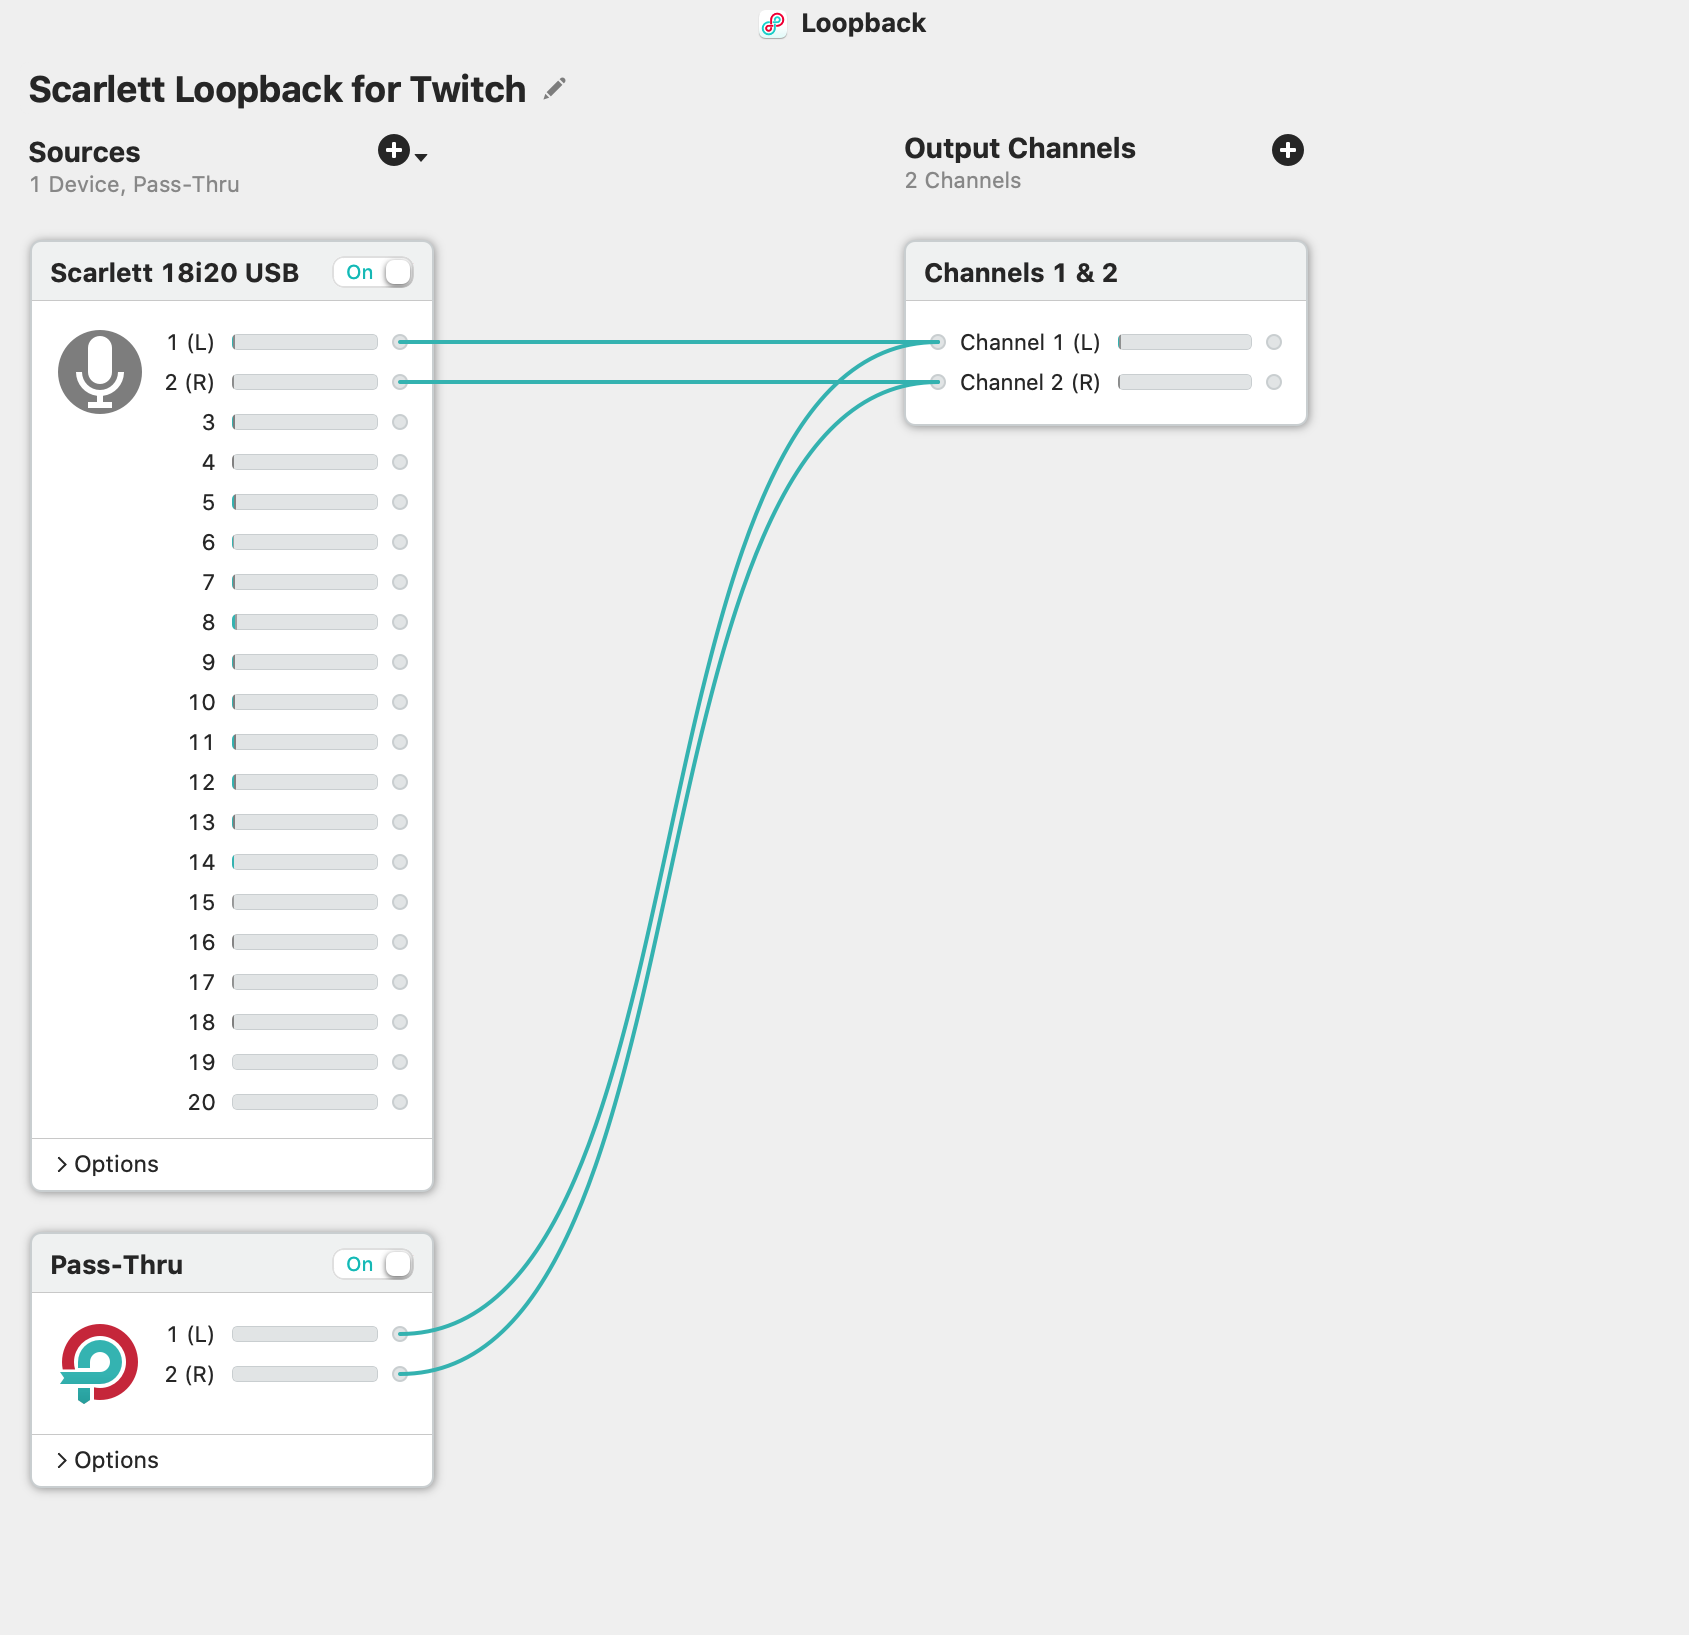
Delete the passthrough device. Add a new output device and drag the channels you want to channels 3 and 4 on the new virtual output. Then delete the original output device that has inputs 1 and 2. Inputs 3 and 4 on the new device will automatically rename to inputs 1 and 2. The end result will look like the following image.

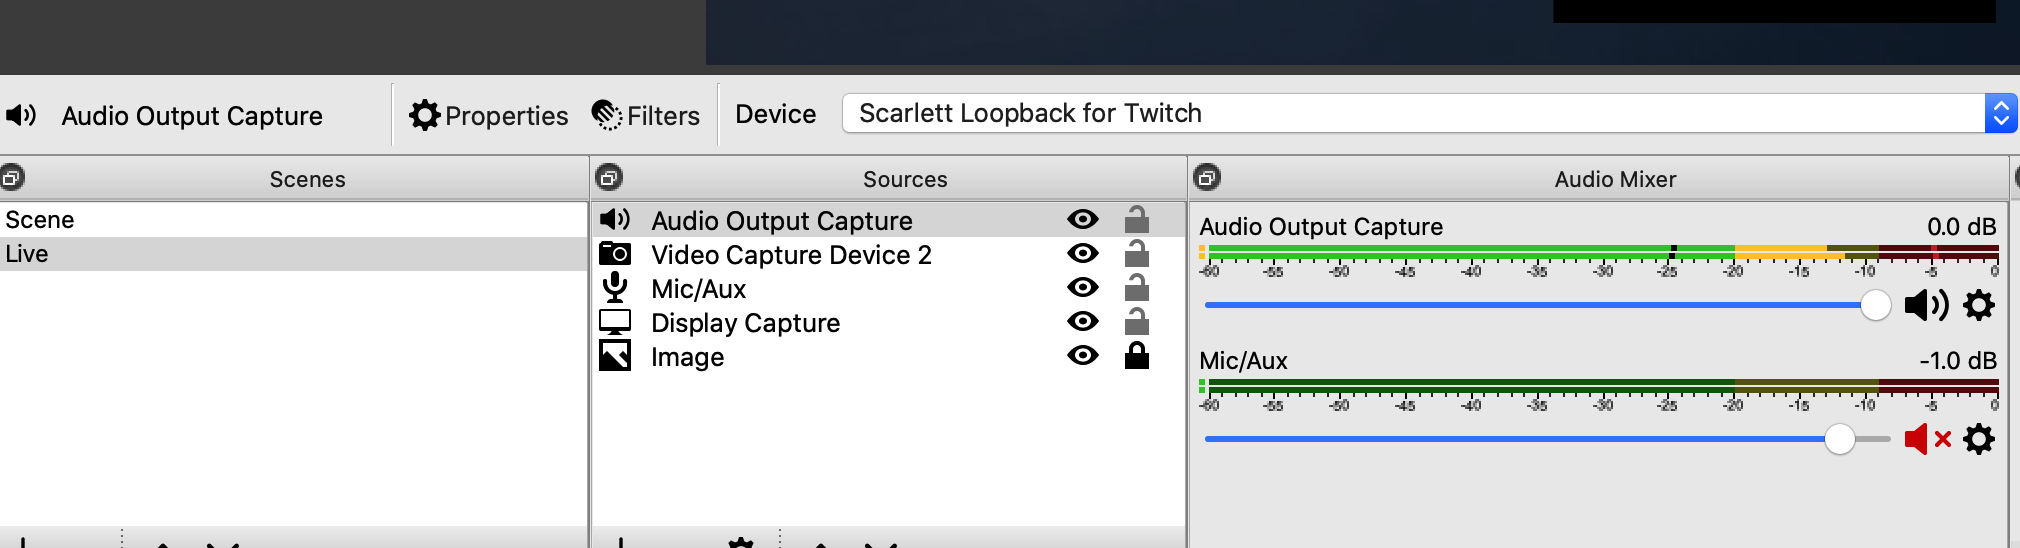
Now you have a device with outputs that OBS can use.
Configuring OBS to Use the New Device
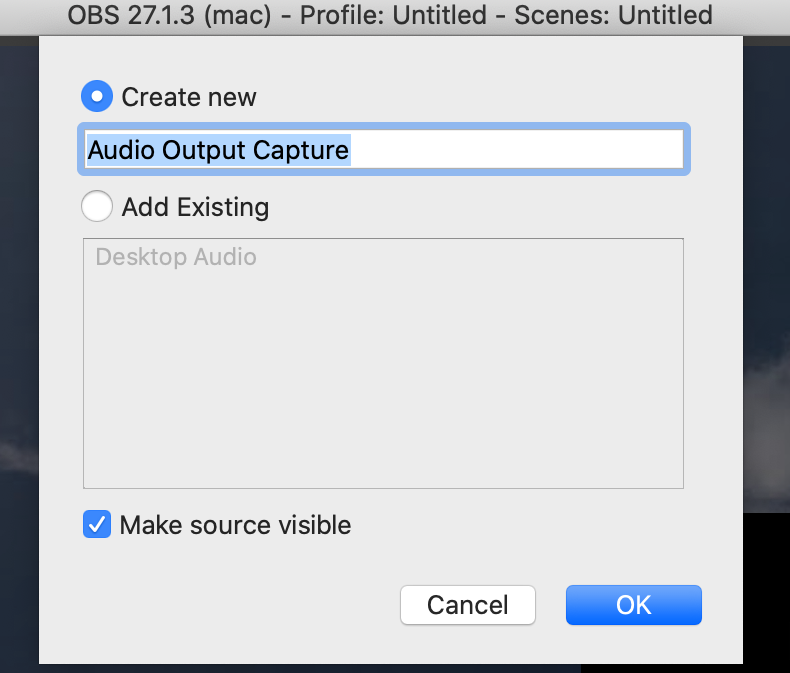
In OBS, add a new Audio Output Capture device. Choose to create a new device and press OK to move to the next step.
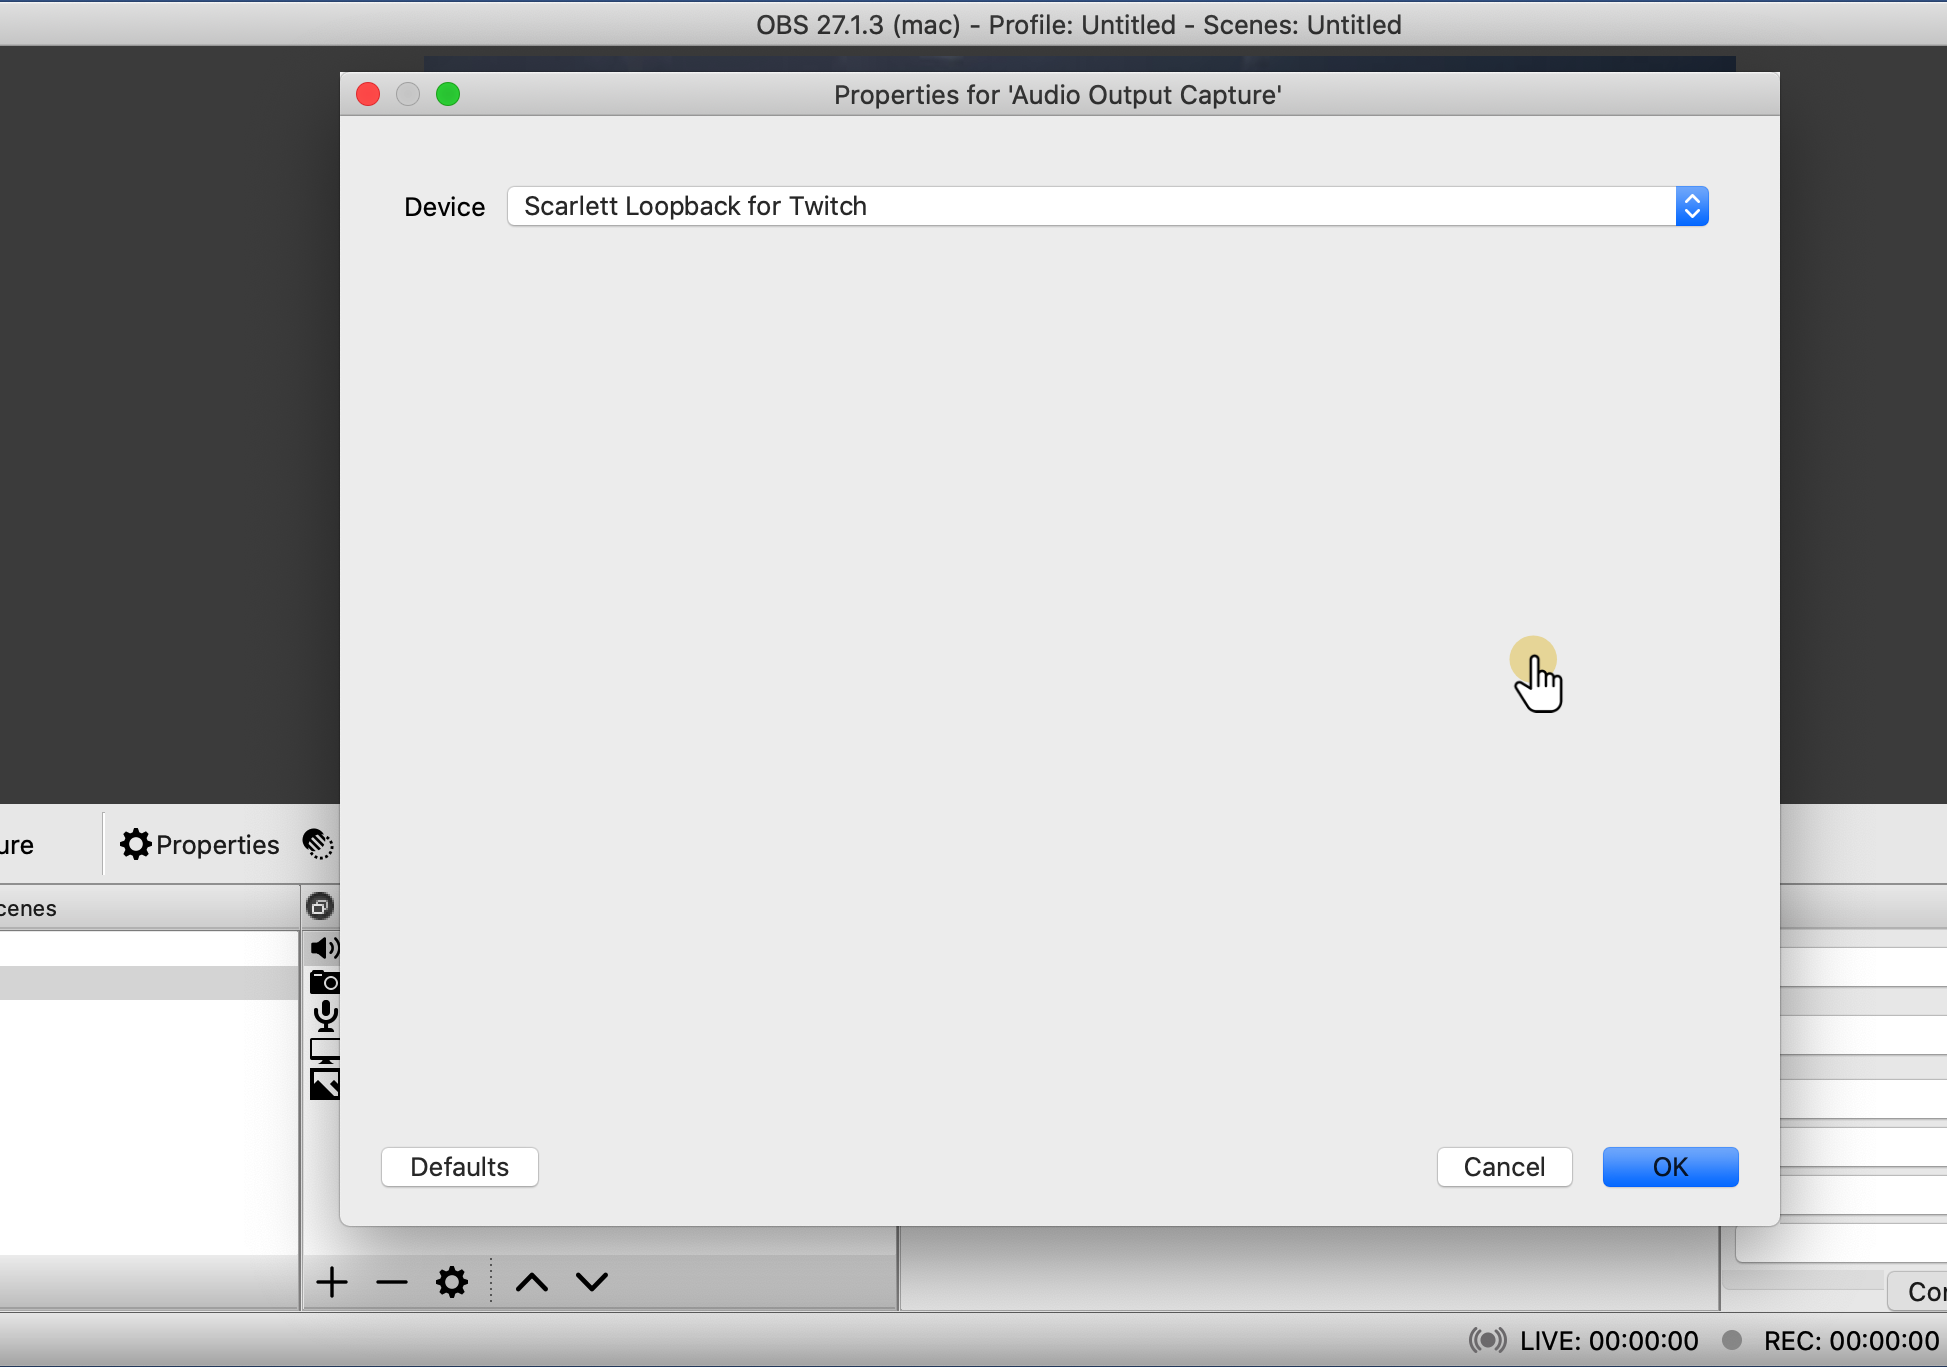
Then choose the virtual you created in Loopback from the dropdown. Press OK to save the device.
Now the audio comes into OBS:
There are many other workarounds to capture audio out there, but this is the one I’ve found to be the easiest to manage. It gives me the best results.
And if you add in your microphone to the virtual device in Loopback, you can use this in Zoom meetings.
I don't have comments enabled on this site, but I'd love to talk with you about this article on Mastodon, Twitter, or LinkedIn. Follow me there and say hi.