Creating a Magic 8 Ball Game with HTML, Canvas, and JavaScript
The “Magic 8 Ball” is a toy shaped like the “8” ball in billiards, created in 1950. You ask a “yes” or “no” question, shake the ball, and look at the answer it provides, which you see through a window on one side of the ball.
In my book Exercises for Programmers, one of the exercises is to use arrays and random numbers to create your own Magic 8 Ball game:
Create a Magic 8 Ball game that prompts for a question and then displays either “Yes,” “No,” “Maybe,” or “Ask again later.”
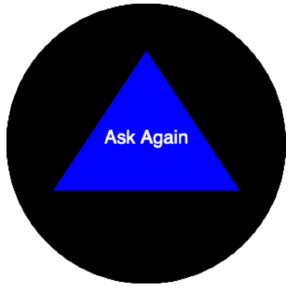
One of the additional challenges in the exercise is to implement this as a GUI application. In this tutorial, you’ll do just that by using HTML, JavaScript, and the Canvas API. When you’re done, you’ll have a Magic 8 Ball game that shows you answers when you click the ball. The end result will look like this:

The Canvas API lets you create 2D raster (pixel) graphics using JavaScript. You define a canvas element on the page, grab a reference to the element in JavaScript, and then use various API methods to draw lines, rectangles, and arcs to create shapes.
You’ll draw the ball using the Canvas API, and then use an event handler to display random text when you click the ball. You can’t modify the canvas directly once you’ve drawn something, so each time you click, you’ll redraw the entire ball with new text.
Let’s get started.
Drawing the Ball
The ball will consist of three elements: a black circle for the ball itself, a blue triangle to represent the area where the text appears, and the text itself. You’ll draw the ball and the triangle first, and the
First create a new file called 8ball.html and add the following code to define a basic HTML5 skeleton with a <canvas> element in the <body> tag:
<!DOCTYPE html>
<html>
  <head><title>8 Ball</title></head>
  <body>
    <canvas height="300" width="300" id="canvas"></canvas>
  </body>
</html>
The canvas element has a height and width defined, and an ID attribute so you can grab it with JavaScript, where you’ll do all your drawing.
Next, add a <script> tag below the <canvas> element that grabs a reference to the canvas using getElementById, and a ctx variable that holds a reference to the 2D context of the canvas. This is what you’ll use to draw the ball.
<canvas height="300" width="300" id="canvas"></canvas>

<script>
const canvas = document.getElementById('canvas');
const ctx = canvas.getContext('2d');

</script>
Next, create a drawBall function to hold the logic to draw the ball on the canvas. The function accepts a string which contains the text that will appear on the ball. Add the following code to define the function and then invoke it so that the ball will eventually appear on the page:
function drawBall(words){
  // code goes here.
}

// Draw the empty ball
drawBall();
Next, write the code to create the ball itself. Start by adding the following code which draws a black filled circle on the canvas:
function drawBall(words = ""){
  // circle
  ctx.fillStyle = 'black';
  ctx.beginPath();
  ctx.arc(150, 150, 150, 0, 2 * Math.PI);
  ctx.fill();

}
This sets the fill color to black and then creates a circle using the arc function. The arc function takes the x and y coordinates for the center of the circle, followed by the radius, the starting angle, and the ending angle in radians. So in this case, you’re creating the circle at 150 over, 150 down, with a radius of 150, a starting angle of 0 (the top), and an ending angle of PI * 2. JavaScript has Math.PI available out of the box.
The fill function then fills in the circle with the color set with fillStyle. The words argument has a default value of an empty string so you can call drawBall with no arguments so the ball won’t display any words. This is how you’ll initialize the game.
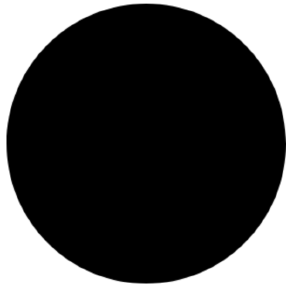
Save the file and reload the file in your browser. You’ll see a black ball:

Now define the blue triangle which will contain the words. Set the color to blue, move the starting point to 150 pixels over and 50 pixels down. Then draw lines from the starting point to 50 across and 200 down, and then to 250 across and 200 down. Draw the third side by making the line end at the original point of 150 across and 50 down. Then fill the space:
function drawBall(words = ""){
...
  // triangle
  ctx.fillStyle = 'blue';
  ctx.beginPath();
  ctx.moveTo(150, 50);
  ctx.lineTo(50, 200);
  ctx.lineTo(250, 200);
  ctx.lineTo(150, 50);
  ctx.fill();

}
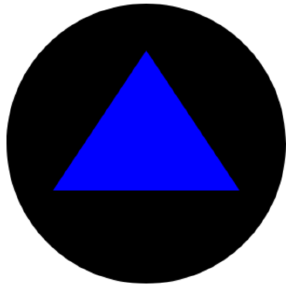
The triangle appears inside the ball once you save the file and reload the page:

Now let’s write the game logic.
Choosing the Random Phrase
The Magic 8 Ball game logic boils down to having a list of possible phrases and choosing one at random, which you can accomplish with a very small amount of JavaScript code.
Below the const canvas line in your script block, add a constant called choices that holds the possible choices that will appear in your 8 ball. You can add more choices if you’d like.
<script>
const canvas = document.getElementById('canvas');
const choices = ["Yes", "No", "Maybe", "Ask Again"];
</script>
Then create a getRandomAnswer function that selects a random value from the array using Math.Random:
// select an answer
function getRandomAnswer(){
  let randomIndex = Math.floor(Math.random() * choices.length);
  return choices[randomIndex];
}
This generates a random number and uses it as the array index. The Math.Random() function returns a random number between 0 and 1. The index you use to select an entry in the array needs to be between 0 and the last index of the array, so you can take the length of the choices array, multiply it by Math.random(), and then round the answer down with Math.floor().
Now when you call getRandomAnswer(), you’ll get a random value from the choices array. Let’s hook this up to the interface.
Displaying the Result
When you click on the ball, you want the text to show up inside the triangle. To do this, you’ll need to add code to the drawBall function to display the text, and create an event listener that fetches the random answer and draws the ball.
First, add the code to display the text in the triangle. Inside the drawBall function, add the following code to display the text if the words argument contains any text:
function drawBall(words = ""){
...

  // the text
  if (words !== ""){
    ctx.fillStyle = '#fff';
    ctx.font = '20px sans-serif';
    ctx.textAlign = "center";
    ctx.fillText(words, 150, 150);
  }
}
This creates a centered text area placed at 150 across and 150 down, which is in the middle of your ball.
Now tie it all together by adding the event listener.
After the call to drawBall(), add this code which listens for click events and redraws the ball, passing in the value from the getRandomAnswer() function:
// The click event that redraws the ball
canvas.addEventListener("click", (event) => {
  drawBall(getRandomAnswer());
});
Your complete project should look like the following code:
<!DOCTYPE html>
<html>
  <head><title>8 Ball</title></head>
  <body>
    <canvas height="300" width="300" id="canvas"></canvas>
    <script>
    const canvas = document.getElementById('canvas');
    const ctx = canvas.getContext('2d');
    const choices = ["Yes", "No", "Maybe", "Ask Again"];

    function drawBall(words = ""){
      // circle
      ctx.fillStyle = 'black';
      ctx.beginPath();
      ctx.arc(150, 150, 150, 0, 2 * Math.PI);
      ctx.fill();

      // triangle
      ctx.fillStyle = 'blue';
      ctx.beginPath();
      ctx.moveTo(150, 50);
      ctx.lineTo(50, 200);
      ctx.lineTo(250, 200);
      ctx.fill();

      // the text
      if (words !== ""){
        ctx.fillStyle = '#fff';
        ctx.font = '20px sans-serif';
        ctx.textAlign = "center";
        ctx.fillText(words, 150, 150);
      }
    }

    // Draw the empty ball
    drawBall();

    // select an answer
    function getRandomAnswer(){
      let randomIndex = Math.floor(Math.random() * choices.length);
      return choices[randomIndex];
    }

    // The click event that redraws the ball
    canvas.addEventListener("click", (event) => {
      drawBall(getRandomAnswer());
    });
    </script>
  </body>
</html>
When you save and reload the page and click the ball, you’ll see one of the phrases:

Conclusion
In this tutorial you created a basic implementation of a Magic 8 Ball game using the Canvas API. From here you can try the following additional exercises:
- Instead of a solid black color, use a radial gradient for the ball. Check out the CanvasGradient documentation for more.
- You can animate the canvas. Rework the code that displays the text so that it fades in and fades out. Remember that to animate the canvas, you need to redraw the canvas, so you’ll need to do some kind of animation loop.
- Try implementing this same application as a command-line tool in your favorite language, or as a mobile app.
Like this post? Support my writing by purchasing one of my books about software development.


Thanks for reading
I don't have comments enabled on this site, but I'd love to talk with you about this article on BlueSky, Mastodon, Twitter, or LinkedIn. Follow me there and say hi.